
To maintain a positive and trustworthy brand presence, it’s essential to use the profanity filter in social walls. This feature automatically removes offensive or inappropriate words, ensuring your social media aggregator displays only clean and engaging content. As a result, your social media wall remains professional and suitable for every audience.
Step 1: First, sign up or log in to your Social Walls account.
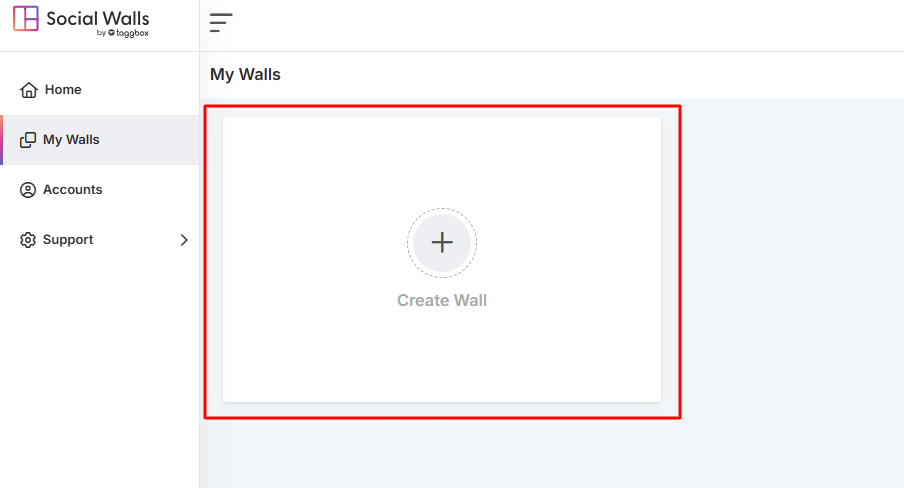
Step 2: Once you’re logged in, you’ll reach your home dashboard. From there, click “Create a Wall”.
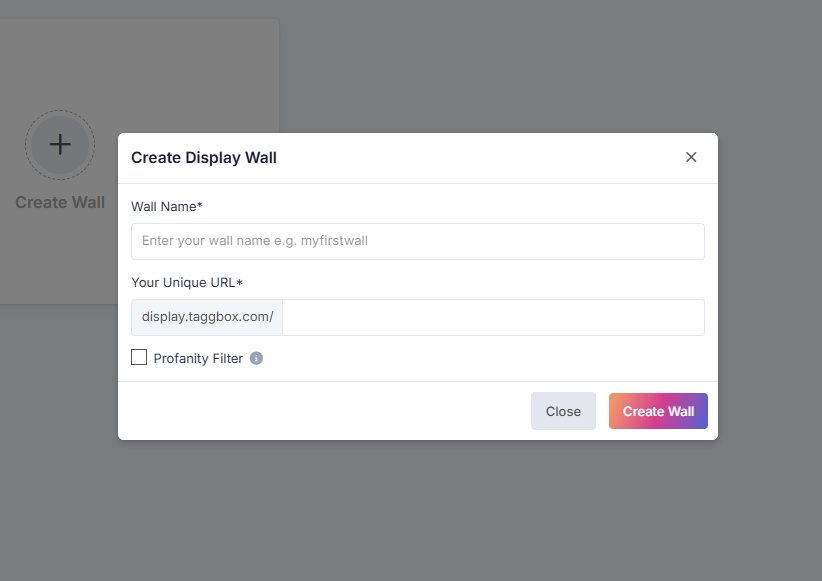
Step 3: After that, give your wall a name that matches your campaign, event, or theme so it looks organized and easy to manage.
Step 4: Next, choose the social media source from which you want to fetch your feeds. For instance, you can connect Instagram.
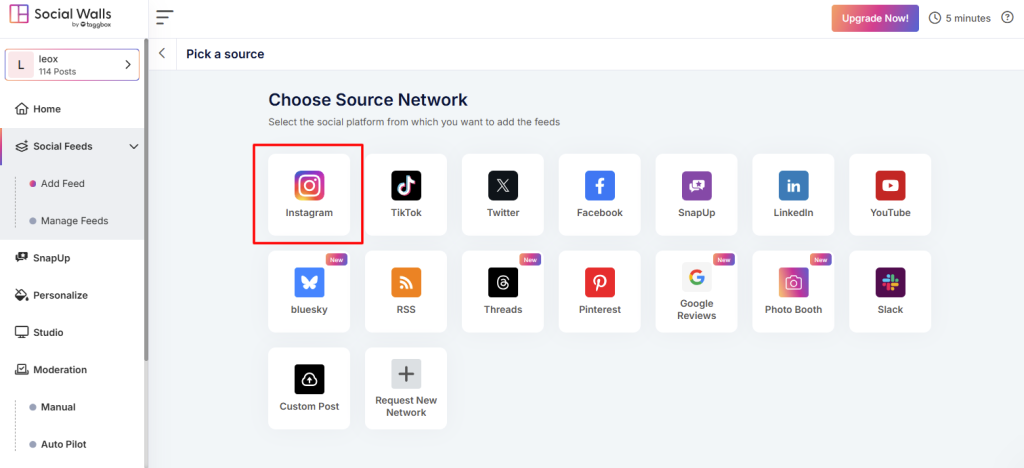
Step 5: For example, select Instagram as your content source.
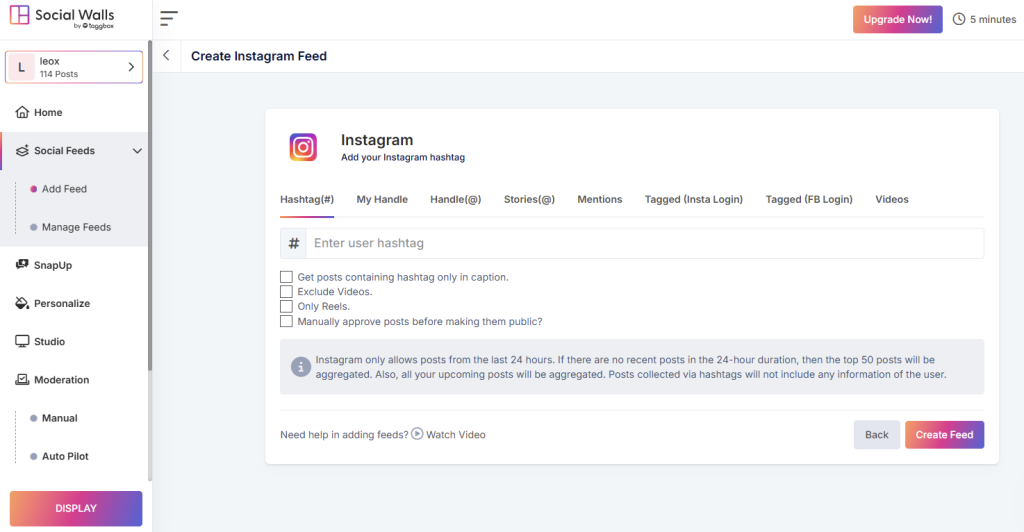
- Hashtags – Pull posts using your event hashtag
- Mentions – Gather posts where users mention your brand
- Tagged Posts – Highlight user-generated content
- Handles / Personal Accounts – Stream posts from your official profiles
- Stories & IGTV Videos – Add rich, immersive visuals
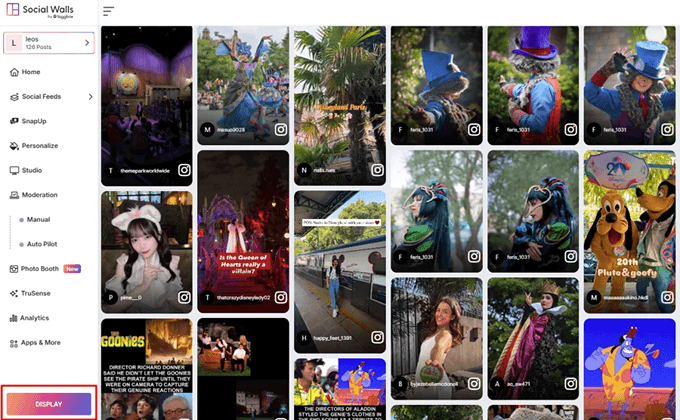
Step 6: Once selected, preview your Social Wall to ensure it looks perfect before enable a profanity filter.
Step 7: Now, navigate to the Apps and More section, where you’ll find the option to enable the profanity filter in social walls.
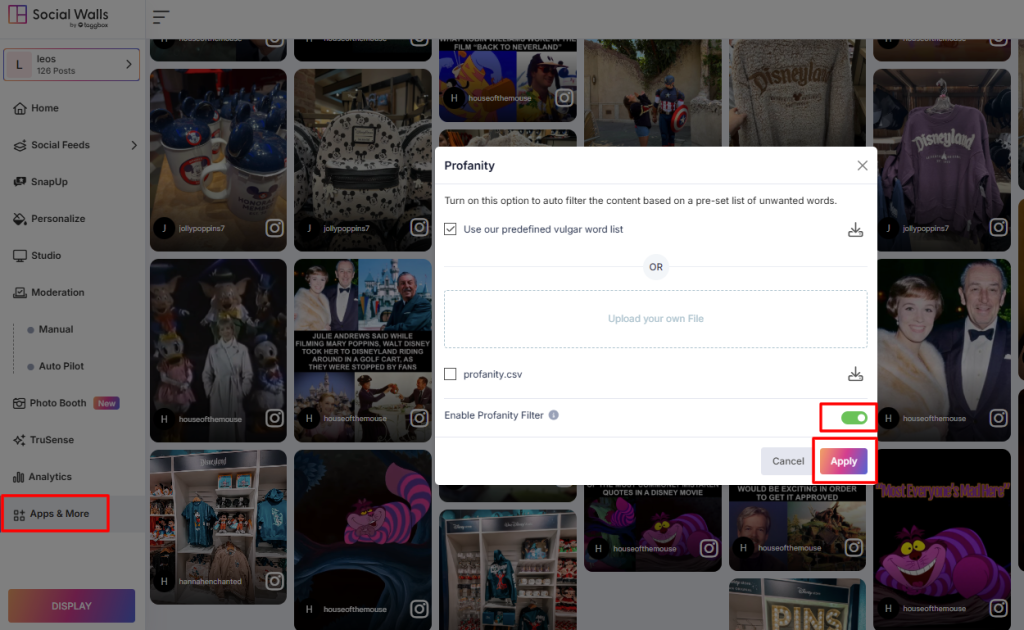
Step 8: Finally, save your changes and refresh your social media wall so that the updates take effect immediately.
By enabling the profanity filter in social walls, you can effortlessly keep your digital displays clean, maintain brand safety, and build audience trust — all while automating the moderation process.
If you need any assistance, feel free to contact us reach out to our support team at support@socialwalls.com.